|

Strategy & Tactics: Starcraft
by Bishnu Bhattacharyya
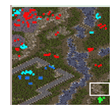 Protoss Mission #1: First Strike Protoss Mission #1: First Strike
Mission Objectives: Meet Fenix at Antioch, destroy Zerg base, Fenix must survive.
This first Protoss mission is a relative cakewalk. You begin with a group of Zealots and a couple of Dragoons. Take them north, hugging the western coast, killing any zerglings and hydralisks you come across. When you come to a bridge, cross it. Do not head further north once you come to the bridge, because then you will have to deal with a group of mutalisks and hydralisks. Cross the bridge and head south. You are trying to reach the blue dots on screenshot, a Protoss base. Once you get there, Fenix will speak, and then it's time to get the Protoss base up and running.

The first thing to do is to build up your resources. Build Probes at the Nexus and get harvesting. Keep your Dragoons at the base entrance, as the zerg will harass your base from time to time. Build a Pylon near your Gateway, and crank out Zealots and Dragoons. Build some Photon Cannons at the entrance to your base to free up Dragoons (see screenshot). Build up a force of 12 Zealots and 12 Dragoons and go and attack the Zerg base to the northwest. You should have no problem taking it out.
Protoss Mission #2: Into the Flames
Mission Objectives: Distract the Zerg while Fenix penetrates the perimeter, kill the Zerg Cerebrate, Fenix must survive.
The mission starts out with a 15 minute counter. This counter means nothing, don't worry about it and start building up your base.
Attacks will come from two directions--the north, and the ramp to the east of your base. Divide your beginning troops so the protect both these locations. The zerg attacks here are merely harassment--none of them will seriously damage your base.
 Once you get your economy going, build a Gateway and start making Zealots. Build a Forge and put 2-3 Photon Cannons at the ramps leading to your base. Continue making zealots, you should have quite a number (around 12) by now. Build another Gateway, and then a Cybernetics Core, and build Dragoons and zealots. Now it is time to expand. If you look at screenshot on the right, you will see an expansion point to the south. There are a couple of hydralisks and zerglings burrowed there. Send 6 zealots, 2 dragoons, and one probe there. Once you have destroyed the zerg forces there build your base. A couple of heavy zerg assaults will come the way of your expansion, so build 5-6 Photon Cannons protecting it. Once the mineral flow at your expansion is established, build your forces up. The zerg have heavily defended their Cerebrate. There are many Sunken Colonies. Once the counter runs down, Fenix, a bunch of zealots and Dragoons, and three Reavers will appear. Reavers fire Scarabs, which are second only to the Yamato Gun in destructive power, however, a Reaver can only hold 5 Scarabs, and you have to build them. Build Scarabs at the Reavers, but do not attack immediately. If you keep Fenix where he appears he will be safe from zerg attacks. Once you get your economy going, build a Gateway and start making Zealots. Build a Forge and put 2-3 Photon Cannons at the ramps leading to your base. Continue making zealots, you should have quite a number (around 12) by now. Build another Gateway, and then a Cybernetics Core, and build Dragoons and zealots. Now it is time to expand. If you look at screenshot on the right, you will see an expansion point to the south. There are a couple of hydralisks and zerglings burrowed there. Send 6 zealots, 2 dragoons, and one probe there. Once you have destroyed the zerg forces there build your base. A couple of heavy zerg assaults will come the way of your expansion, so build 5-6 Photon Cannons protecting it. Once the mineral flow at your expansion is established, build your forces up. The zerg have heavily defended their Cerebrate. There are many Sunken Colonies. Once the counter runs down, Fenix, a bunch of zealots and Dragoons, and three Reavers will appear. Reavers fire Scarabs, which are second only to the Yamato Gun in destructive power, however, a Reaver can only hold 5 Scarabs, and you have to build them. Build Scarabs at the Reavers, but do not attack immediately. If you keep Fenix where he appears he will be safe from zerg attacks.
Meanwhile, you must worry about the assault force you are building up. have 24-36 Zealots and 12-24 Dragoons and you should be fine. The Cerebrate is to the south of the map and is protected by four sunken colonies. When you attack the zerg base, attack on two fronts. Try to keep the Reavers alive, they will be instrumental in killing the Cerebrate. You should not attack with Fenix himself. Your forces will suffer heavy casualties, and Fenix most likely will die. Your primary objective is to kill the sunken colonies, then the other units. When you reach the Cerebrate, attack the sunken colonies (all of them) with Zealots and Dragoons while the Reavers blow apart the Cerebrate itself.
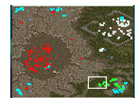 Protoss Mission #3: Higher Ground Protoss Mission #3: Higher Ground
Mission Objective: Destroy Zerg forces.
This mission introduces you to the Scout, the most powerful fighter in StarCraft. It's air to air weapons rival that of the Battlecruiser, but it's armor is far weaker, and it is quite expensive. Nevertheless, these Scouts will comprise your main assault force in this mission.
If you look at Screenshot #1, you will see that the two Zerg bases. The white one is obviously weaker, so that is where your first assault should be.
When the game starts, build a Gateway and an Assimilator with one of your starting Probes. Do the usual build up resources/set up defences routine. For defences you will need a few Photon Cannons, a dozen Zealots, and 4-6 Dragoons, plus the units you begin with. The bulk of attacks against your base will come from the northwest and northeast, divide your forces up between the locations.
Once your defences are established, make six Dragoons (by now you should have built a second Gateway) and expand. The most suitable expansion point is in the southwest of the map. There are a couple of Hydralisks burrowed there, but your Dragoons should kill them easily. Build a Nexus and 4-6 Photon Cannons there and mine minerals and gas. You should have extensive resources by now, so begin upgrading. The first thing you want to upgrade is shields--they will be most important.
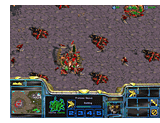 Now it is time to build up your assault force. If you look at the screenshot on the right, you'll see that the amount of sunken colonies present at the red base are enough to stop any ground assault, so you'll need to use Scouts. Build two Stargates and crank out Scouts at top speed. When you have 24, you have enough to blow up the white base. It should be fairly simple. When you are done, return them to base, recharge their shields with Shield Batteries, and build some more Scouts. Even though the red base seemingly has less air defences than the white one, there are several burrowed hydralisks which make life painful. You should build an additional 6 to 12 Scouts, and take out that base. Once again, you should easily destroy the enemy. Now it is time to build up your assault force. If you look at the screenshot on the right, you'll see that the amount of sunken colonies present at the red base are enough to stop any ground assault, so you'll need to use Scouts. Build two Stargates and crank out Scouts at top speed. When you have 24, you have enough to blow up the white base. It should be fairly simple. When you are done, return them to base, recharge their shields with Shield Batteries, and build some more Scouts. Even though the red base seemingly has less air defences than the white one, there are several burrowed hydralisks which make life painful. You should build an additional 6 to 12 Scouts, and take out that base. Once again, you should easily destroy the enemy.
 Protoss Mission #4: The Hunt For Tassadar Protoss Mission #4: The Hunt For Tassadar
Mission Objectives: Find Tassadar and bring him to the Beacon.
Beating this mission is fairly easy--it just requires patience, and precise unit control. You will need to use Templars throughout this mission, as the Psionic Storm ability is a great equalizer in the first half, and the Archon Merge is needed in the second half.
Yes, there are two parts to this mission. The first half involves you getting to Tassadar, and the second involves you taking Tassadar back to the beacon. If you look at the first map, you'll see that I have traced the path for you to follow. Tassadar is located at the Blue Base in the northwest, while the Red Base in the northeast is a massive Zerg hive.
The purple dots you pass over on the way to Tassadar are sunken colonies. Each sunken colony is surrounded by burrowed units--enough burrowed units at each sunken colony to kill your entire force unless you're smart enough to use the Templar you started out with to it's full extent. Advance towards the first sunken colonies like so: Take one Zealot. Have it followed closely (but not too closely) by the Templar. It should be close enough so that you could (if you wanted to) hit the Zealot with a dose of Psionic Storm, but far enough that you could keep the Templar out of the storm's radius. I recommend hotkeying the Zealot and Templar and also memorizing the shortcut for Psionic Storm (the letter 't'). When the Zealot gets close enough, a bunch of zerglings and hydralisks will pop up and run for him. Let them reach the Zealot, and when the attack, use Psionic Storm on the Zealot, and all the zerg units will be killed. Do not attempt to pull the Zealot out of the storm, as that will lead out the enemy units as well. When the Storm has concluded, pull the Zealot (it shouldn't be dead, just severely damaged) out of the range of the Sunken Colony, and attack it with all your troops. Psionic Storm doesn't damage buildings, so don't try to kill it Psi Storm. Your troops should easily kill the sunken colony.
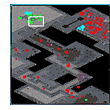 There are two sunken colonies you will have to pass using this method. Burrowed zerglings aren't just located at the sunken colonies, either. You should proceed to Tassadar using the Zealot/Templar combo the whole time. If your Zealot dies, use another. If they all die, use a Dragoon, though that shouldn't matter. There are two sunken colonies you will have to pass using this method. Burrowed zerglings aren't just located at the sunken colonies, either. You should proceed to Tassadar using the Zealot/Templar combo the whole time. If your Zealot dies, use another. If they all die, use a Dragoon, though that shouldn't matter.
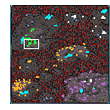
Once you get to Tassadar, there will be an altercation, and your mission objective will change slightly: You'll have to bring Jim Raynor back to the beacon along with Tassadar. You are, however, surrounded by Zerg now. If you look at second map, you will see that there are several groups of zerg between you and your beacon. Now you will need to build up a big enough force at your new base. As usual, begin harvesting resources and putting up defences. You will not need to build units for a while, but if you have enough credits build Zealots at the Gateway. You should construct a loose arc of Photon Cannons covering the south of your base, as a couple of attacks come from that direction, and should construct many Photon Cannons to the east, as many zerg come around and try to attack your Mineral Fields. The third screenshot shows you the defences you will need in that area.
 Once your defences are set up, begin making troops. To return to beacon, the best way is to retrace your steps. The useful unit here will be the Archon. Ensure that you have the optimum number of units collecting Vespene Gas, build a second Gateway, and start churning out Templars, and merge them into Archons. Get 18-24 Archons, then retrace your path to the beacon, with Tassadar and Raynor trailing your Archons. If you have any other forces at your base, send them along as well. Once you engage in a massive battle at the beacon, just send the heroes in while the enemy is occupied. Once your defences are set up, begin making troops. To return to beacon, the best way is to retrace your steps. The useful unit here will be the Archon. Ensure that you have the optimum number of units collecting Vespene Gas, build a second Gateway, and start churning out Templars, and merge them into Archons. Get 18-24 Archons, then retrace your path to the beacon, with Tassadar and Raynor trailing your Archons. If you have any other forces at your base, send them along as well. Once you engage in a massive battle at the beacon, just send the heroes in while the enemy is occupied.
 Protoss Mission #5: Choosing Sides Protoss Mission #5: Choosing Sides
Mission Objectives: Bring Tassadar and two Zealots to the beacon.
The beacon is in the southeast corner of the map, and if you look at the map, you'll see that the bulk of the zerg force are between you and it. You'll have to take a roundabout route, but there are surprising triggers the good programmers at Blizzard have incorporated into this missions.
The white base to the east of you is a Terran sprawl of Missile Turrets and Supply Depots. There is no unit production going on there, so that's the route you'll take to the Beacon. However, it is important that you do not attack the Terrans until you have a sizeable force, as there will be repercussions (in the form of a massive Terran strike force) if you do.
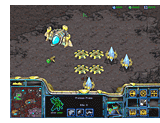 As usual, star harvesting resource and building up defence. The Zerg will harass you throughout mission by dropping hydralisks, ultralisks, and zerglings via overlord, and sending over mutalisks and guardians. If you look at the screenshot on the right, you will see the base defences you should have. The zerg attacks come from two directions, the south, and the ramp coming up near your Vespene Geyser. Get 4 or 5 Photon Cannons at each point. As usual, star harvesting resource and building up defence. The Zerg will harass you throughout mission by dropping hydralisks, ultralisks, and zerglings via overlord, and sending over mutalisks and guardians. If you look at the screenshot on the right, you will see the base defences you should have. The zerg attacks come from two directions, the south, and the ramp coming up near your Vespene Geyser. Get 4 or 5 Photon Cannons at each point.
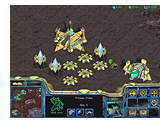
Once your base is established, make a Forge and Cybernetics Core and upgrade shields and air weapons and armor. If you haven't already done so, put Tassadar a couple of Zealots on your shuttle and move it out of the way (northwest corner). Now you should expand. There is a suitable expansion point down the ramp from your starting point. Make a base there, and be aware that now attacks against that base will also be launched. The third screenshot shows you adequate defences for your expansion.
 Now you're ready to build up your offensive force. Build a robotics facility and a robotics support bay, and upgrade your shuttle speed. Now, build two or three Stargates and crank out Scouts fast. Once you have 18-24, commence your attack. Attack the Terran Missile turret with all your Scouts and destroy it, then quickly pull back. General Duke will send a Battlecruiser and several Wraiths at you. The Wraiths don't cloak, you should have no problem taking the force out. Then slowly advance to the beacon, with the Shuttle trailing behind your Scouts. When you get to the beacon, land Tassadar and the Zealots through the chaos of battle and send them to the beacon, and you will have beaten the missions. Now you're ready to build up your offensive force. Build a robotics facility and a robotics support bay, and upgrade your shuttle speed. Now, build two or three Stargates and crank out Scouts fast. Once you have 18-24, commence your attack. Attack the Terran Missile turret with all your Scouts and destroy it, then quickly pull back. General Duke will send a Battlecruiser and several Wraiths at you. The Wraiths don't cloak, you should have no problem taking the force out. Then slowly advance to the beacon, with the Shuttle trailing behind your Scouts. When you get to the beacon, land Tassadar and the Zealots through the chaos of battle and send them to the beacon, and you will have beaten the missions.
 Protoss Mission #6 Protoss Mission #6
Mission Objectives: Rescue Zeratul, leader of the Dark Templar; Tassadar and Zeratul must survive.
This mission, the final indoor mission, is the most difficult mission in the game, in my opinion. You begin with Tassadar and the two Zealots you delivered to the beacon in the previous mission. Don't try to go back to that mission and send Tassadar into the beacon with 12 Archons or something. It doesn't work.
Do succeed in this mission, you have got to proceed much like in Protoss Mission #4, where you used Zealots to cajole burrowed units out of the ground, and them hit them with Psionic Storm. You must do the same thing here, however you only have two Zealots. You must use Tassadar's Hallucination spell, which creates a phantom Zealot the enemy mistakes for a real one. The hallucination spell spawns two fake units, and they expire after a time, so try to use both of them effectively. When Tassadar's power is drained, rest. Another important thing is, if an upcoming enemy force isn't too large, then don't use Psionic Storm; rather use Tassadar and the Zealots to attack them directly, saving precious Psionic points for Tassadar. At the same time, however, don't use Tassadar and the Zealot in a combat role too much. If both the Zealots die, Tassadar cannot Hallucinate himself, so losing the Zealots pretty much means the mission is over (unless you have some Marines with you).
Throughout the mission you will come across Terran Marines, Ghosts and Firebats who will join your troupe. You will amass a sizable amount of these, but do not stop scouting ahead hallucinations. This is because the zerg emply Infested Terrans, mutated Marines which will run at you and explode, causing 500 damage over a wide area. The Marines with you can detect these Infested Terrans, and will ask "what was that?" or something before it runs at you. Because of this, you should scout ahead with a Marine rather than a hallucinated zealot when you get them.
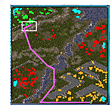
The map shows you the general layout of this mission, one of the more confusing maze-maps. You retrace your path quite a lot, so it's easier to describe it in text rather than draw in the route.
When the mission starts, proceed south, killing the Infested Terran, and some burrowed hydralisks and zerglings. Go down the stairs, and rescue the Marines. Now head southwest to rescue some more Marines. There is a pretty sizable burrowed Zerg force, including an IT, so be wary. Rescue the Marines, and go northeast past the two doors and across the bridge (the second left). Don't head past the bridge, because there is a huge amount of waiting zerglings. Cross the left bridge, and go up the stairs. You'll find a Protoss Beacon and you'll get a couple of Zealots anda a Dragoon.
Now go back to where you rescued the first batch of Marines and head southeast down the hall. There are some burrowed Hydralisks and an IT, so send a Marine ahead and have it shoot the IT, or just use Psionic Storm. Continue until you get to a four way. Go southeast first and pick up some more Marines. Once you get the Marines, a bunch of Hydralisks and zerglings will pop up. Don't bother using Psi Storm, you won't lose many Marines if you fight in the conventional method.
Go back to the four way and head northwest. There are two burrowed IT's here, and a beacon that unlocks the doors. Go back to the beacon and proceed on the last leg of the trip. There are many ITs, and missile banks hidden in the walls. Use hallucinations to absorb the ITs, and take out the wall traps by conventional means (ie, firepower).
Go up the stairs to your left, and through the security door. There are hydralisks, zerglings, and an IT here. Kill them, and rescue the Terrans to the left. Also activate the beacon.
At this point a bunch of zerglings come your way, the heaviest resistance you have met so far. Use Psionic Storm to partially stop some of the zerglings, but you're gonna need brute force as well. This would be a good time to use the Marine's StimPack ability. If you survive, the rest of the mission is cakewalk. Go to the beacon, enter the room, and activate the mission inside it and you're finished.
The key to this mission is unit management. Have your units grouped (your marines as one, Tassadar as two, hallucinations as the come and go, etc.). Also memorize the shortcuts--Psionic Storm is 't', and Hallucination is 'l'. That, and save often. Now, onward!
 Protoss Mission #7: Homeland Protoss Mission #7: Homeland
Mission Objectives: Destroy the heart of the Conclave; Fenix, Tassadar, and Zeratul must survive.
This mission is laughably easy if done the correct way. The second screenshot shows you the Nexus that is the heart of the conclave. Your mission objective is to destroy it, which is difficult with the conventional all out assault because you do not have the higher level Carriers in this mission, and because it is extremely well defended.
This is, however, the first mission in which you can use constantly cloaked, extremely powerful Dark Templar, and the good programmers at Blizzard have put a hole through which they can go.
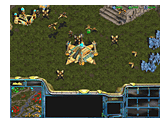 The Protoss have cloak detection in the form of Photon Cannons and Observers. Photon Cannons are immobile, and fairly obvious, but Observers are also cloaked constantly. The difficulty in finding this path is searching out the Observers, and there are none found on the path highlighted in the map. The Protoss have cloak detection in the form of Photon Cannons and Observers. Photon Cannons are immobile, and fairly obvious, but Observers are also cloaked constantly. The difficulty in finding this path is searching out the Observers, and there are none found on the path highlighted in the map.
As the mission begins, Aldaris declares you and Tassadar traitors, and your heroes immediately fall under attack. This is a dangerous situation because Tassadar or Zeratul could die at any time. Quickly pull your forces back into your base in the northwest corner of the map. The Photon Cannons there are adequate to hold off the enemies that follow you.
Now it's time to attack. Take all your Dark Templar, including Zeratul, and follow the path I have laid out in the map. You don't have to follow it exactly, but never stop moving, and don't attack anything until you get to the Nexus.
Attack the Nexus with all your Dark Templars when you get there. As soon as that happens, the enemy will send an Observer to detect you, but by the time it arrives you will have destroyed the Nexus. Tassadar will make a speech, and then you have beaten the mission.
 Protoss Mission #8: The Trial of Tassadar Protoss Mission #8: The Trial of Tassadar
Mission Objectives: Rescue Tassadar from Stasis Cell, Fenix and Raynor must survive.
This mission is similar to the earlier mission, except that you have no Dark Templars. Brute force is the order of the day here, but it is made more challenging by the enemy computer's Arbiters, capital ships with an incredibly annoying spell (Stasis, which you first ran into in the zerg campaign).
This mission is the first one where you get access to the Protoss Carrier, the Protoss Capital Ship. They are faster than Battlecruisers and have longer range, but they have a slightly weaker attack (unless upgraded). They're useless in this mission.
 Screenshot #2 shows you your objective, Tassadar's Stasis Cell. With 5000 hit points, it is quite difficult to take down with carriers, as it is heavily defended, and also has Arbiters casting Stasis to totally mess up your attack. In this mission, you must make use of hallucinations, and Reavers. Screenshot #2 shows you your objective, Tassadar's Stasis Cell. With 5000 hit points, it is quite difficult to take down with carriers, as it is heavily defended, and also has Arbiters casting Stasis to totally mess up your attack. In this mission, you must make use of hallucinations, and Reavers.
Reavers, the massive sluglike crawlers, feature the massively powerful Scarab as their attack. The downside is Reavers have little armor and are extremely slow. They way to get around this is shuttle them in. Protoss shuttles are extremely fast once they're speed is upgraded. Unfortunately, they will be destroyed before they deliver their payload--the Stasis Cell is heavily defended. The way to get around this is to have around 12 Scouts (Hallucinated) arrive a split second before before the shuttles do. Then they can unload the Reavers (which only need to get off one shot each) before dying.
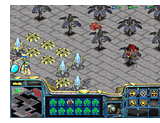
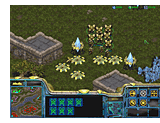 Start the mission in your usual way, harvesting resources/building up defences. The computer launches several powerful attacks on your base early in the mission, including Scouts and Carriers. As soon as the mission starts, load Interceptors onto the Carrier, and move it, Raynor's Battlecruiser, and your dragoons just east of the mineral field. First a couple of Scouts will come, then some more accompanied by a carrier. Screenshots #3 and #4 show you more than adequate base defences. Note that for Screenshot #3, the Dragoons are quite unnecessary, but the Zealots are (takes out the Reavers before they get there). You should also have approximately have the defences of Screenshot #3 at the other entrance to your base. Start the mission in your usual way, harvesting resources/building up defences. The computer launches several powerful attacks on your base early in the mission, including Scouts and Carriers. As soon as the mission starts, load Interceptors onto the Carrier, and move it, Raynor's Battlecruiser, and your dragoons just east of the mineral field. First a couple of Scouts will come, then some more accompanied by a carrier. Screenshots #3 and #4 show you more than adequate base defences. Note that for Screenshot #3, the Dragoons are quite unnecessary, but the Zealots are (takes out the Reavers before they get there). You should also have approximately have the defences of Screenshot #3 at the other entrance to your base.
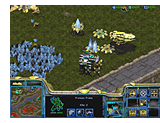 Once your defences are established, expand. The map shows a good expansion point halfway up the eastern barrier of the map. Land a probe and as many Zealots you can there via Shuttle. Build a perimeter of Photon Cannons, the get a Nexus and start harvesting resources. Once that's done, build up your attacking force. Once your defences are established, expand. The map shows a good expansion point halfway up the eastern barrier of the map. Land a probe and as many Zealots you can there via Shuttle. Build a perimeter of Photon Cannons, the get a Nexus and start harvesting resources. Once that's done, build up your attacking force.
This is what you will need: Six Shuttles (with the speed upgrade), 12 Reavers (with the Scarab damage and carrying capacity upgrade), and 6 High Templars (with Hallucination researched).
Hotkey your units--the Reavers are group #1, the shuttles are group #2, and the hallucinated scouts are group #3. Yep, your six Templars are going to hallucinate a single scout, which will absorb firepower while your Shuttles deploy their troops.
Then, select an area near the Stasis Cell and send your Scouts and Shuttles to the same spot. Make sure you use the "unload" command for the Shuttles. Send the Scouts off just ahead of the shuttles. As soone as the Reavers land, select them and target the Stasis Cell. It should be easily destroyed.
 Protoss Mission #9: Shadow Hunters Protoss Mission #9: Shadow Hunters
Mission Objectives: Use Zeratul to destroy the Zerg Cerebrates, Fenix and Zeratul must survive.
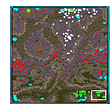
There are two Zerg Cerebrates to kill in this mission, both heavily defended. The map shows the locations of the two Cerebrates (the green dots). The only way to destroy them is to have Zeratul personally go up there and claw it to death, but other units can damage it, helping out.
The key to this mission are Carriers. They bring the pure destruction needed to clear a path for Zeratul to come down.
When the mission starts, take your forces and head east. You'll come to a mineral cluster, without a Vespene Geyser. Set up a base there, using the resources you already have to build two Pylons, a Gateway, and a Nexus. Start mining minerals.
This is the first mission where the Zerg employ Defilers, nasty things you were glad to have on your side in the Zerg Campaign. They come at you every now and then, using Dark Swarm and Plague. As soon as you can get a loose ring of Photon Cannons, to detect and destroy them.
So start your usual defence/resource buildup. Dragoons will be useful, be sure to research their Range upgrade. Once you set up your first base, go further east and expand at the Vespene Geyser. All you need here is a Nexus, and Assimilator, three Photon Cannons and a Pylon. Once this has finished, upgrade shields at the Cybernetics Core. Then, build a StarGate and Fleet Beacon, and research Interceptor Capacity Increase. Build a Carrier if you can, but you should expand some more before doing a Carrier buildup.
To the west lies another mineral cluster and Vespene Geyser. Expand there, and defend it appropriately. Now, build two or three more StarGates and start making Carriers. Also build a Robotics Bay and a Shuttle to load Zeratul onto. Once you have 8 to 12 carriers with 8 interceptors each, clear a path to the first Cerebrate, with Zeratul closely following behind. Once you've destroyed one, continue clearing a path to the next one. You should have no trouble beating the mission at this point.
 Protoss Mission #10: The Eye of the Storm Protoss Mission #10: The Eye of the Storm
Mission Objectives: Destroy the Overmind; Raynor, Zeratul, and Tassadar must survive.
The final mission in StarCraft, it is also the easiest if you exploit the one thing this map gives you: Resources. They are all over the map, and here you also have 400 supply points to play with. If you look at the map, the resources have been largely unmined by the Zerg. Always take a couple of Siege Tanks and a couple of Goliaths when expanding. The southwest corner as a huge mineral field, and there are multiple Vespene Geysers in the northeast. Your will, however, have to heavily defend these expansions.
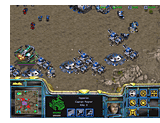 This mission can be difficult because you have to set up thorough defences at both your bases, and that's difficult to track. What you should do is hotkey your Command Center and your Nexus so all you need to do to flip screens is to hit a key twice. This mission can be difficult because you have to set up thorough defences at both your bases, and that's difficult to track. What you should do is hotkey your Command Center and your Nexus so all you need to do to flip screens is to hit a key twice.
So as usual, set up defences and harvest resources. Raynor's Battlecruiser and Tassadar's Carrier will be instrumental in defence, so build Interceptors. Screenshot #2, #3, and #4 show you appropriate defences at your bases. Don't wait to mine the second Vespene Geyser at the Protoss base, it will really help speed things along.
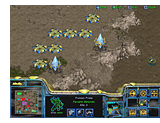
Expect the Zerg to throw whatever they have at you; Scourge, Mutalisks, Guardians, and Ultralisks. Defilers will also prove to be an annoyance. It's important to have good detection at your base, as they will burrow, then pop up and cast Plague at their whim.
Once your defences are ready, expand. I recommend expanding mostly with the Terrans. The Protoss should only expand to resources just north of their starting point. Try to fill most of the expansion points, and when you do, start building up your forces.
Battlecruisers and Carriers are the order of the day here, 12 to 18 of each. Make sure that the Battlecruisers are equipped with Yamata Guns, and that their weapons and armor has been upgraded. Same with Carriers, make sure their shields and attacks are at least level two, as they will be forced to take the brunt of your attack.

When your forces are ready, circle the Carriers to where your Battlecruisers stand ready and carve a path to the Overmind, in the center of the map. Keep the Carriers slightly in front of the Battlecruisers so the Scourge hit exclusively. Once you get to the Overmind, Yamato it. If you even six or so remaining Battlecruisers (which is a worst-case scenario), you still should be able to weaken it enough to easily destroy it. When it's killed, all you have to do is sit back and watch the cut scene--it's really a nice one.
Next up, the Zerg Campaign
|
|
|
|

